
It's no secret that bike brakes become less effective with time. You'll notice cables stretch and pads start to wear away. Worn-out brake pads can cause a safety hazard, and loose brake cables may make it harder for you to brake, leading to severe accidents in the future.
That’s why adjusting your brakes makes your bike perform better and guarantees you the safety you need. Adjusting bike brakes is an important skill every cyclist needs to have.
The good news is, the process is not complicated. In this article, we will hold your hand and walk you through the process of maintaining, aligning, and adjusting your bike brakes. Let’s get started.
Contents
Adjusting the brake cables
Find out the type of brakes your bike has. There are two types of bike brakes, V and mechanical disk brakes. Both of those brakes have two main points you can use to adjust the brake cables. You will see one at the caliper and the other at the barrel adjuster.
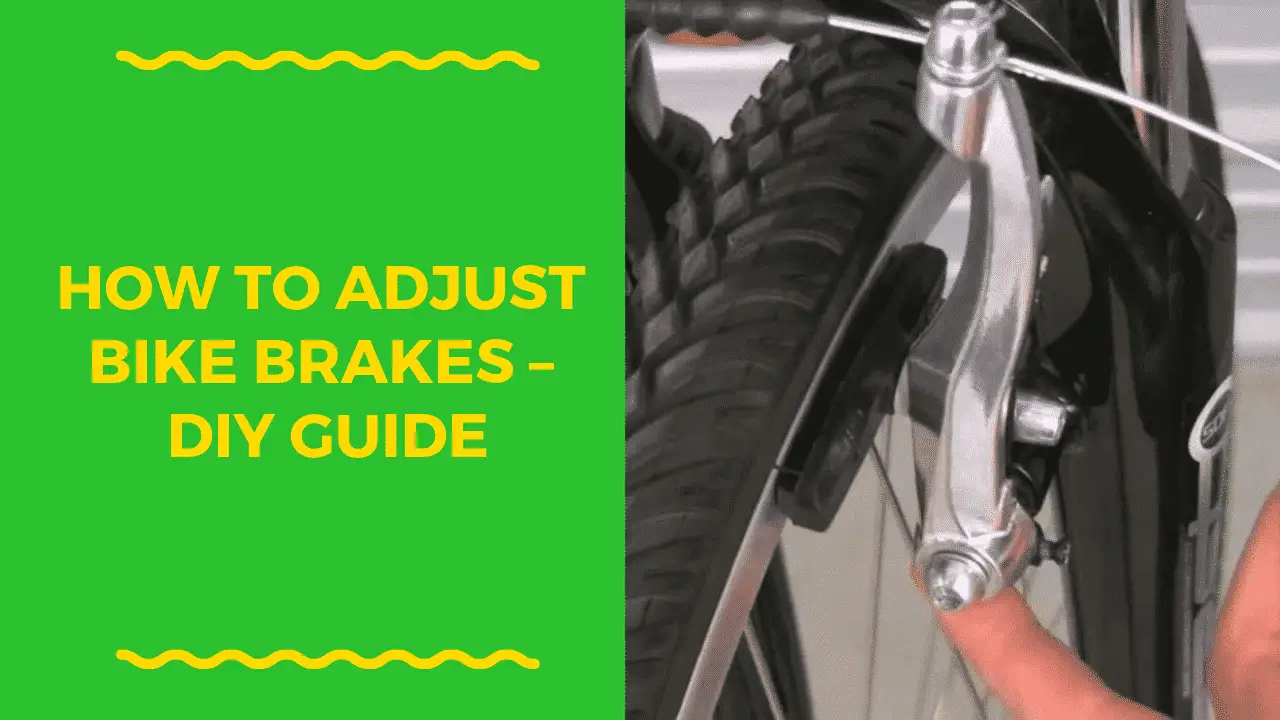
V brakes have a horseshoe-shaped caliper, and it's attached to the brake pads near the tire. Mechanical disk brakes have a claw-looking caliper near the disk at the center of the wheel. The metal cuff on the brake cable is the barrel adjuster located at the brake lever.
When you are having a challenge pulling the brake lever to slow down the bike, or it squeezes into the handlebar, chances are, you need to adjust the brake cables. If the brake levers are too tight or too loose, then something is wrong with your bike.
If you find the lever touching the handlebars, it's a sign the brake cable is loose. In most cases, the brake lever needs to squeeze 3 to 4cm before it becomes hard.
Once you have figured out the cause of the problem, the next step is to use the barrel adjuster to either tighten or loosen the brake cable. Tighten the barrel by rotating it clockwise and loosen it by turning it anticlockwise.
Doing that will increase or decrease the tension in the cable, respectively. You can watch the video below to see how you can tighten or loosen the barrel adjuster.
Readjust the brake caliper
Sometimes the problem can be in the caliper, and it may need some readjustment. If after you have adjusted the barrel and the brake lever is still tight, chances are, the brake caliper might be the problem. The cable may be too loose or tight on the caliper.
To fix these, you need an Allen key to loosen the caliper's cable by rotating it anticlockwise. Ensure you don't unbolt entirely; otherwise, you may have to reassemble the whole braking system.
Next is releasing the brake cable through the caliper. Once the bolt is loose, it will sprung back from the wheel and the cable. Then you will pull the cable outward if you want to tighten the brake and inward if you're going to loosen the brake. If you have v brakes, make sure the brake pads never touch the rim, but they are a few millimeters apart.
With disk brakes, you tighten the cable and ensure the lever has enough room to move and won't reach back when you hit the caliper. When everything is okay, you can screw the caliper bolt back up and test your brakes again.
If, after all these, the brakes are not working well, you may need to start adjusting the barrel adjuster and readjust the caliper again.
Adjusting v brake pads
Adjusting brake pads is similar to adjusting brake cables. If your brakes are making a screeching noise, chances are you need to adjust your v-brakes. The first thing is checking your pads. Brake pads wear is the cause of poor brake traction and alignment. If you have worn pads, then you need to buy one.
Always buy either black or natural colored brake pads, which most bike experts recommend. Artificial colored brake pads cause a horrible honking sound when you are pulling your brakes. Here are the steps to follow:
Step 1: Find the place that needs adjusting
Pull the bike's brake lever to find out the location that needs adjusting. When your brakes are aligned, the brake pads squeeze on the rim when you pull the brake lever.
The brake pads need to squeeze on the rim's center without coming close to the tire. That way, your brake will achieve maximum surface contact with the rim. Misalignment also happens when one side of the brake squeezes loosely on the side, overlapping the rim.
Step 2: Let the bolts holding the brake pads loose.
When you have known the area that needs adjusting, you need to let loose the bolt on the brake pad using an Allen key. You will need to either adjust or loosen both brake pads.
Bear in mind that you don't need to loosen them too far because the pads can slip out of the holder, and bolts fall. Loosen the bolt a little to allow the brake pads to move forward and backward at about 5mm. Doing so will align your brakes well.
Step 3: Ensure your brakes are in the correct position.
The brakes need to sit on your wheel well. If they are too loose, you need to close the gap between the rim and pads. If they are tight, ensure they are slightly further from the rim.
Don't forget to align the pads with the wheel's arc by ensuring they don't rub on the tire or overlap. According to most bike experts, the pads' ideal position is a few millimeters from the rim. If you want your brakes to be responsive, ensure you have a short distance between the brake pads and the rim.
Step 4: Tighten the pad bolts.
Once you’re happy with the work you have done, tighten the bolts using the Allen Key. Be cautious so that you don’t apply too much pressure and pull the brakes out of the alignment when you tighten them up.
Finally, make sure you balance the tightened bolt on each side. That way, the brake pad will be responsive and work perfectly well.
Adjusting the mechanical disk brakes
Mechanical disk brakes also have two pads for squeezing the wheel's component to slow down. A mechanical disk brake has a metal disk located at the center of the wheel known as a rotor.
The mechanical disk brakes can wear down and be misaligned with the rotor. What's more, worn out disk brakes are dangerous, and it's not noticeable like those on V brakes. That said, you must maintain them from time to time. Here's how to go about it:
Step 1: Put your bike upside down on a surface
The process of adjusting the brake’s rotor is spinning the wheel. If you want to do that, you need to make sure the bike is upside down, where the handlebar and saddle are touching the flat surface. Alternatively, you can invest in a bike stand. It will help you do regular bike maintenance with ease.
Step 2: Check the rotor’s alignment
When you look at the wheel, you'll notice the rotor sits in a gap inside the brake caliper. An unevenly spaced rotor on either side means you will need to adjust the caliper. Start spinning the wheel to check the rotor's alignment.
In most cases, the rotor will move with the wheel. If you have a bent rotor, you should experience some wiggling on either side when you spin the wheel.
Sometimes having a bent rotor means that you need to get a new rotor, but you can still bend it back. You will always know that the rotor is in the correct position when there's no lateral movement when you rotate the wheel.
Step 3: Loosen the mechanical disk brake bolts.
A rotor that appears closer to one brake pad than the other means you will have to bring the caliper to the correct alignment.
To do this, you will have to loosen the bolts on both sides of the caliper(top and bottom). Ensure that you don't loosen the bolts too much but enough slack in their fitting without falling off.
Step 4: Squeeze the brake.
Once the brake caliper is loose, rotate the wheel and pull the brake lever. You'll notice the brake caliper gripping against the rotor to bring both pads into the correct alignment with each other. Pull the brake levers again and tighten the bolts up.
Step 5: Test the brake levers
When you release the brake levers, they should sit in the middle of two brake pads. If you want to notice this, you need to test the brake levers.
First, spin the wheel to make sure there's no movement with the calipers. Check to see if the caliper is spaced. If not, you will have to loosen the bolt one more time and put it in the proper position.
Conclusion
Safeguarding your bike should be a priority and that begins by knowing how to adjust your bike brakes. That way, you will be quick to pull brake levers in case of emergencies.
With patience, you'll get used to adjusting bike brakes without any challenges. If you run into challenges while adjusting bike brakes, don't hesitate to take the bike to the bike shop for professional care.
